How do you make a Victorian laced corset?
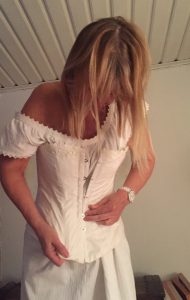
When we first started Augusta’s Journey, Kerstin got interested in the fashion of the time – the late 1840s – and decided to start making historically accurate clothes. Her first garment was a laced corset – the must-have underwear of the Victorian era (the original Victoria’s secret 🙂 ). It was beautiful! And it looked really professional.
“Here,” Kerstin said, “try it on! And by the way, you need to make one too.”
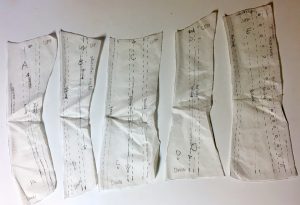
 The next day, we spent a few hours copying the pattern she had altered from an online source (“Please be aware this pattern if free and does not come with instructions”). With the pattern, she gave me enough fabric, ribbons, and 26 fake whale bones. The next day we purchased the required hardware: a front-planchette and brass grommets.
This all happened in November.
Two weeks ago, I finally opened the bag with all the materials and put it in nice little heaps on my sewing table. And then I looked at the pictures of Kerstin’s finished corset. Somehow, I should just be able to convert all the materials into that! With no instructions.
Then I remembered that Kerstin had bought an adjustable dress form for this project, and I thought, that must be the magic trick. It would just be like the TV series Project Runway. I would simply pin up the fabric on this dummy and start making creative clothes. That led to a week of agonizing over types of dress forms – adjustable (expensive) or cheap one-size forms (bad reviews) and lots of other alternatives. I just needed one that looked like me and one on which I could pin the fabric. Of course, you could probably make one…? Googling “make your own dress form” led me to great video instructions of the Duct Tape Dress Form. This is where you wear a t-shirt and have someone wrap you in duct tape (no, I am not including those pictures 🙂 ). This creates a form of your body that you will then fill with pillow stuffing. And that is what I did, and it worked beautifully.
So now there were no more excuses – I had all that I needed.
 I thought it would just take a day or two. I hadn’t realized that there were 5 pattern pieces for a total of 20 fabric pieces to cut out and stitch together. Then 26 channels to be stitched for the bones, using ribbon. And then there were the questions of which seams to stitch in what order – which was up and down, left and right, inside and outside, and how should the hardware be fitted into the seams?
While getting my head around the 3D questions, I felt grateful to my mother who always let us use her sewing machine and had cartons full of fabric and ribbons for us to use; to my father who was a good role model by sewing sails and beach bags for our sailing summer vacations; to my elementary school teacher, Miss Sörén, who taught us the importance of perfect seems (I didn’t appreciate it at that time); and to my middle school teacher who taught us how to make clothes. And most of all to Kerstin, who had done all the research and provided me with a pattern and assured me that I could also make a corset, just like hers.
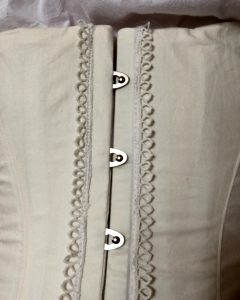
 Day after day, the piles of materials were shrinking and the corset was taking form. Embellishment was of course up to me. Kerstin had used lace and embroidered her corset. I found some beautiful antique napkins with tatted lace in a local thrift store and used the lace on the front.
After 2 weeks, I had finally succeeded in making the laced corset.
Now for the next project: make that 1847 skirt and bodice (and then a bonnet, an umbrella, a purse, and shoes). Watching BBCs drama series about Queen Victoria is a great inspiration though, and there are so many beautiful dresses I can only dream about making. Stay tuned 🙂 .
